You can use the time tracking feature to keep track of how much time you've spent working on a project. There are three ways to add time to a project:
- Add time directly to the Time Tracking page.
- Add time to a ticket when updating the status.
- Add time when committing a project.
Each of these methods will add to the total time of the project.
When entering time, you can either do it in the format of mmm (the number of minutes) or hh:mm (the number of hours followed by the number of minutes).
Adding Time Directly
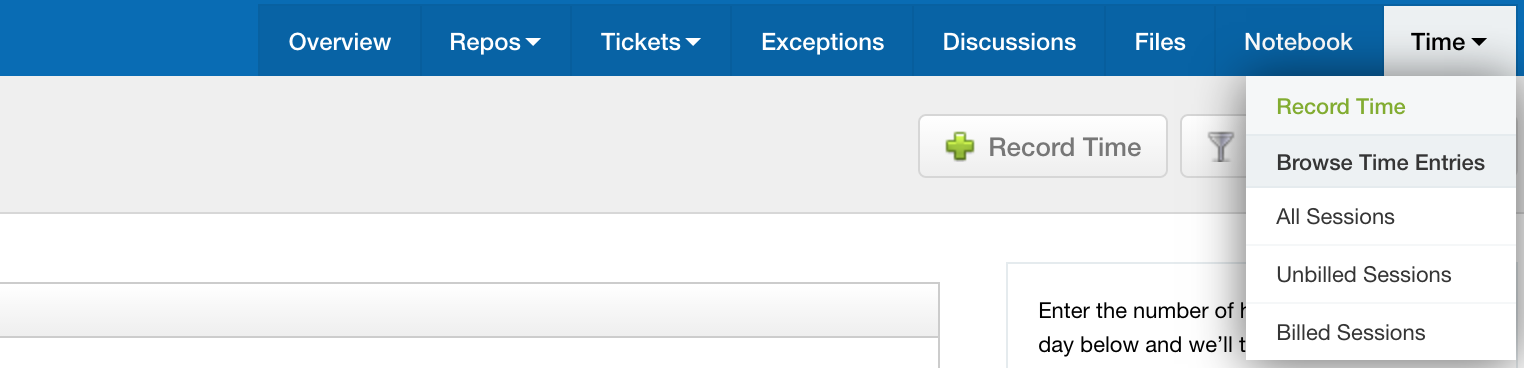
To add time directly to the project, visit the Time Tracking page and click the Record Time button:

Or by clicking the button of the same name at the top of the Time drop down:
From here you can add a description of the work done, enter the date it was done, and finally the time taken in either minutes or hours in hh:mm format:
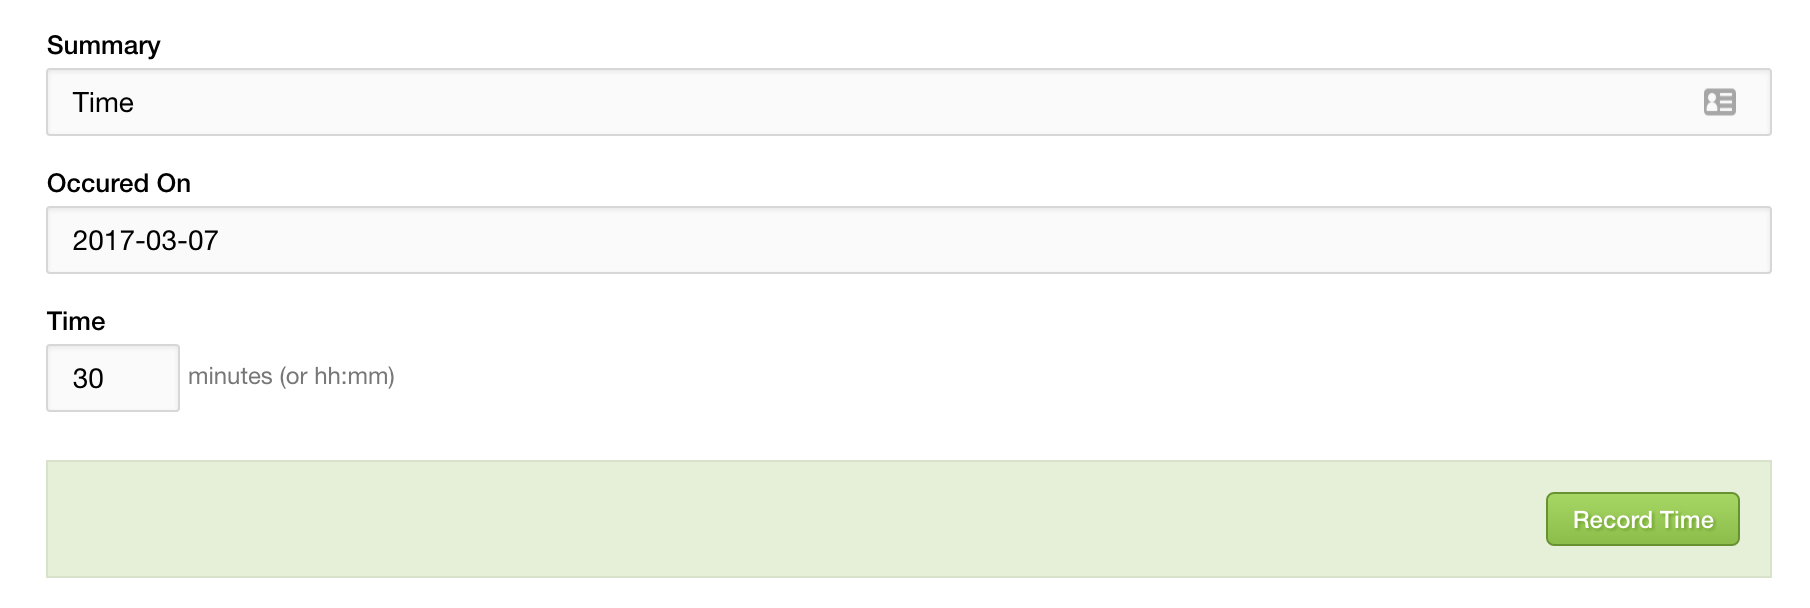
Then click Record Time to save the session.
Adding Time to a Ticket
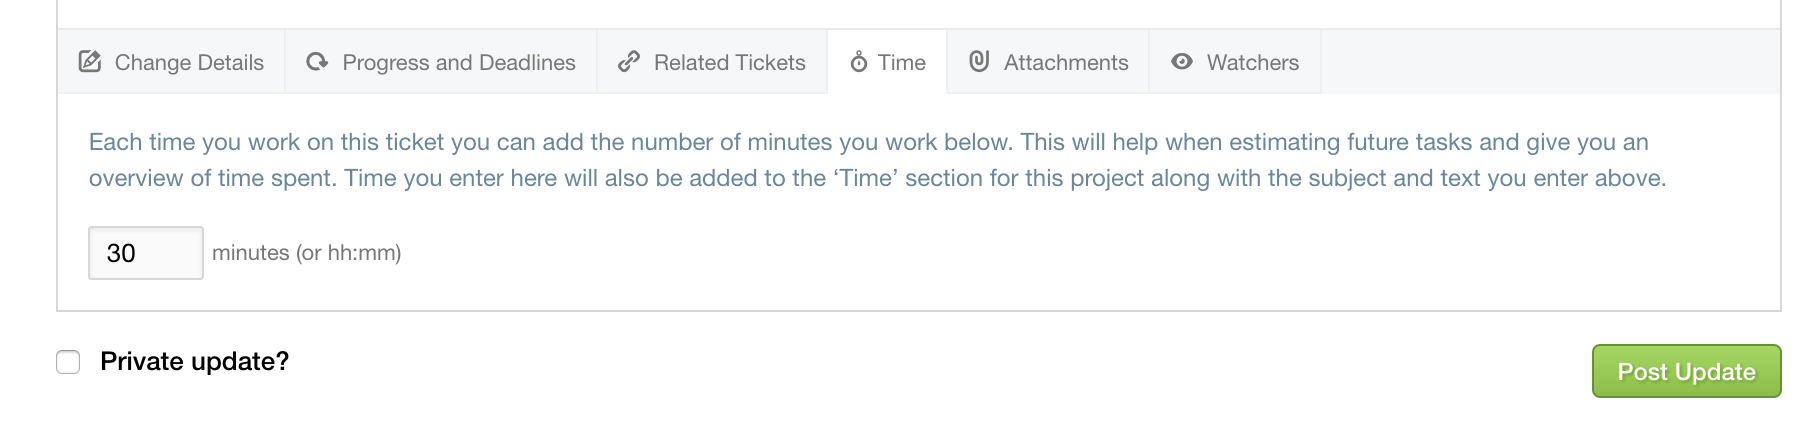
When updating a ticket, you can add time to the project by clicking on the Time tab at the bottom, then enter the time to add. The time will automatically be added to the total for the project.
Adding Time to a Commit
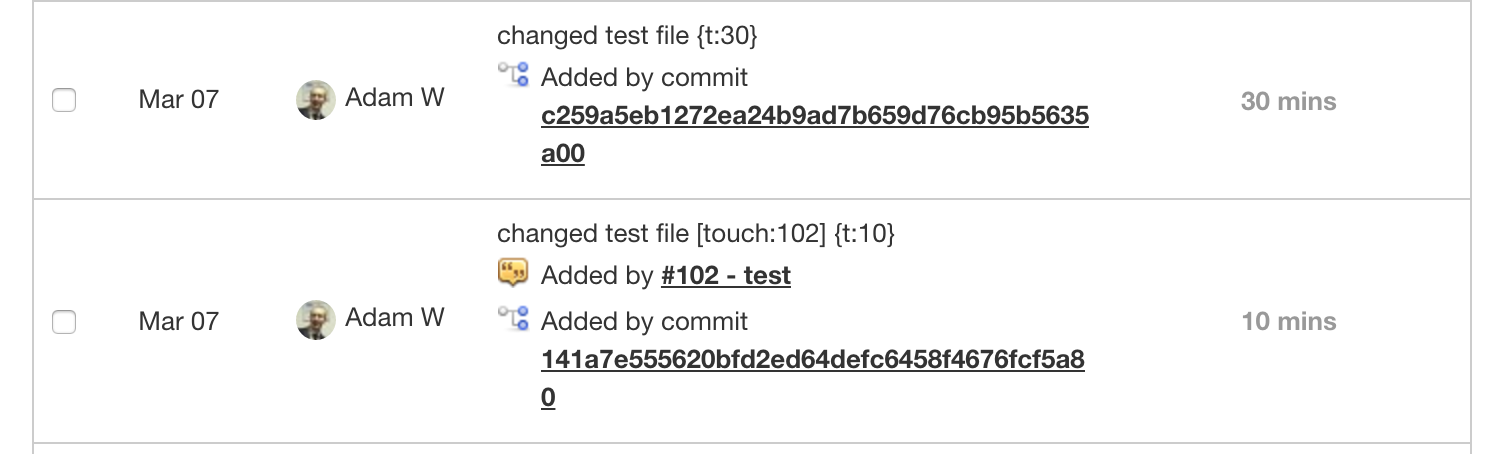
The third way of adding time is to do it by adding {t:123} (where 123 is the number of minutes to add) to any commit message and the time will be added and linked automatically.
You can also add time directly after touching a ticket to link the commit and time to it. Within the Time Tracking page, you can see the time session created, and a link to view the commit: