To create a custom report click on the Advanced Search button next to the Search button in the ticket browser:
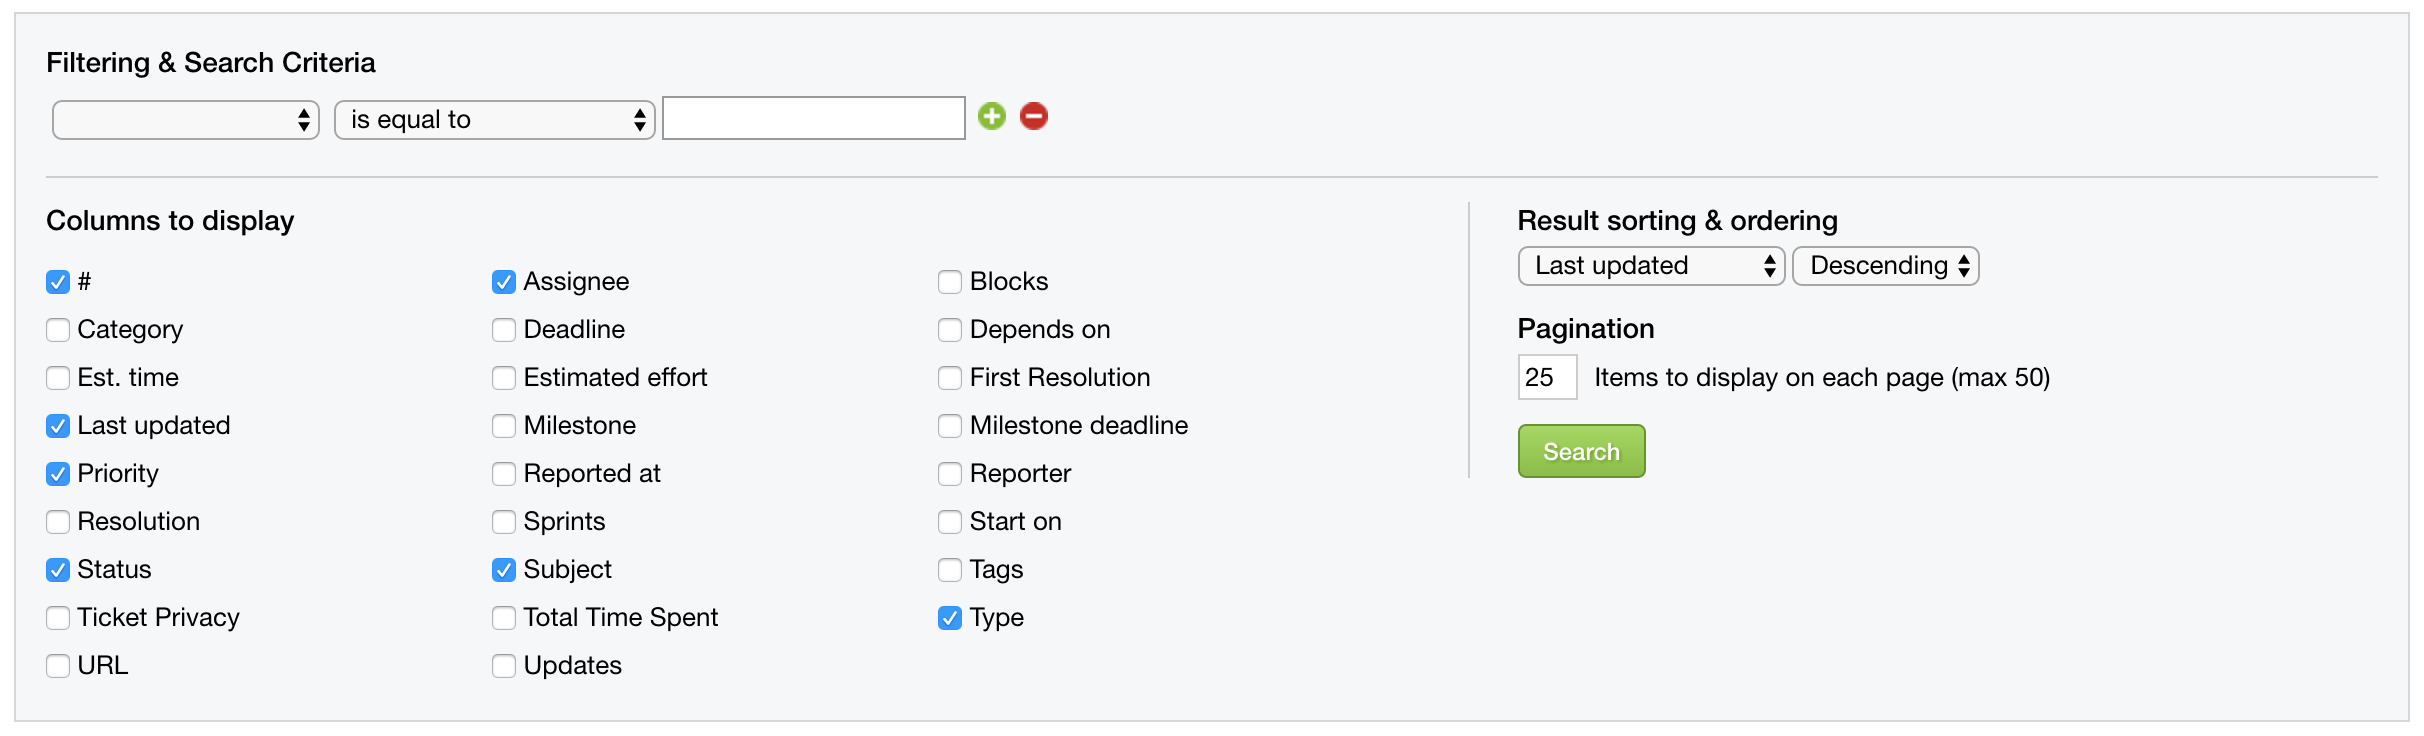
Choose the options for your search; the checkboxes that you select directly relate to the columns that will appear in your report.
After you have the report looking as you want it, look to the bottom of the page and you will see the following save message and button. click Save Search:
You will then be given the option to name your report and choose who can see it. after choosing these options click Save Search to finish.

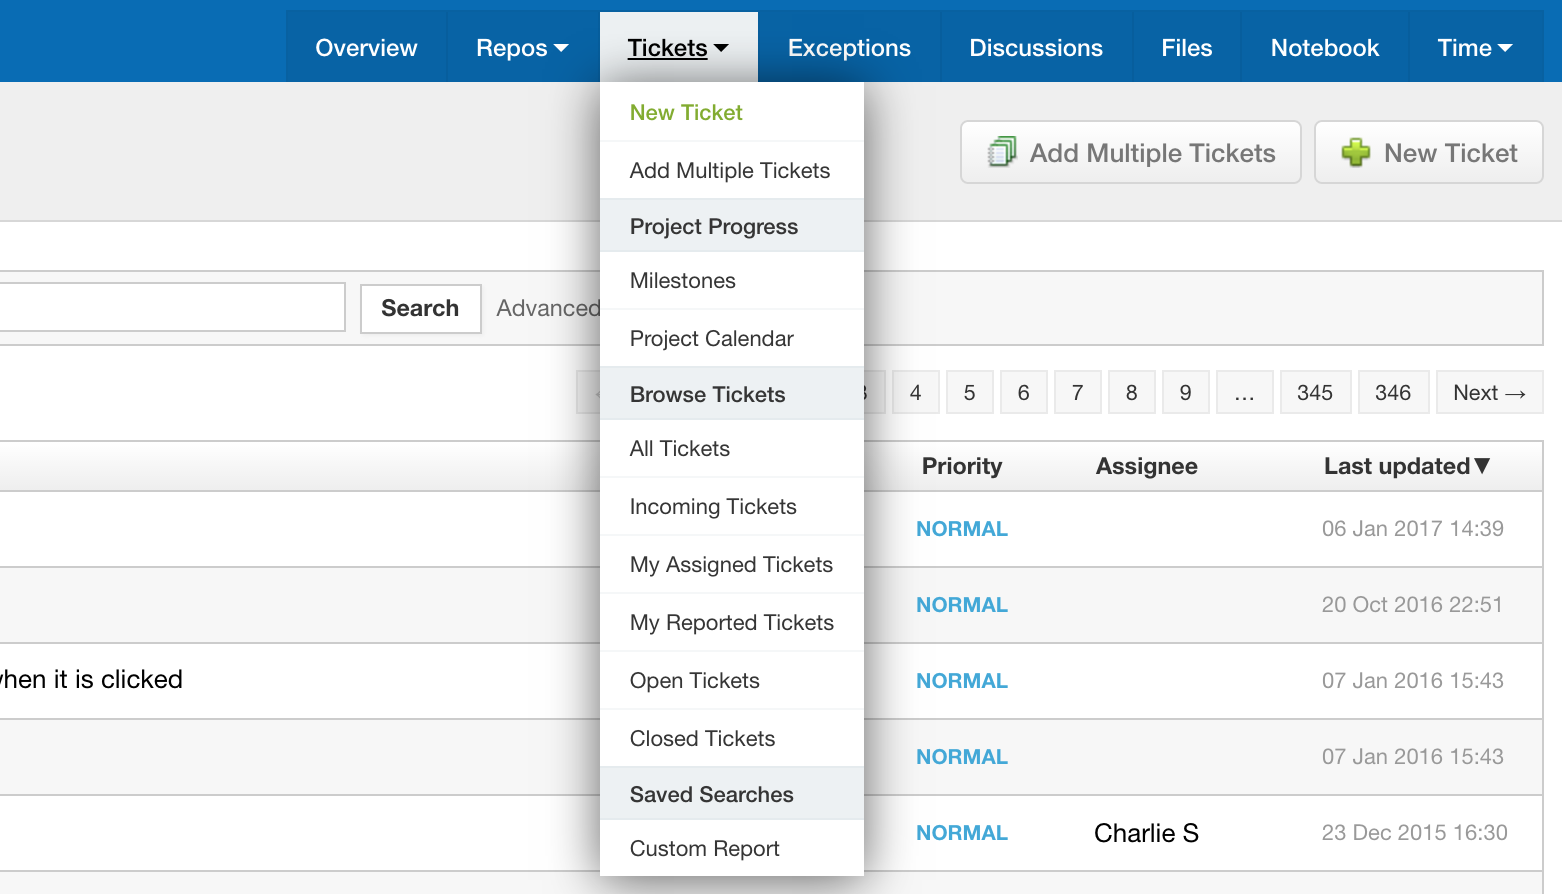
You will then notice that in the ticket drop down tab there is a new section called Saved Searches and your custom report will be in it:
If you modify the search criteria whilst viewing a saved search you will see the following message at the bottom of the screen. If you wish to re-save the search with the new criteria then click Save changes to 'Custom Report' search. If you want to create a new report based on the new criteria then click Save as new search, you will then be presented with options to name and choose who can see this new search as before.
